If you’ve ever tried adding dried flowers to wax sachets, you’ll know it can get… a little messy. Petals floating away in hot wax, flowers refusing to stay where you want them, and the occasional wax spill — I’ve been there.
When I made my first floral wax sachet, I thought it would be as simple as sprinkling petals in and letting the wax do the rest. Let’s just say the final piece looked more like a potpourri accident than a delicate sachet!
Over the years, I’ve found little tricks to make decorating wax sachets much easier — and completely mess-free. Today, I’m sharing them with you.
Why Dried Flowers Make Wax Sachets So Special
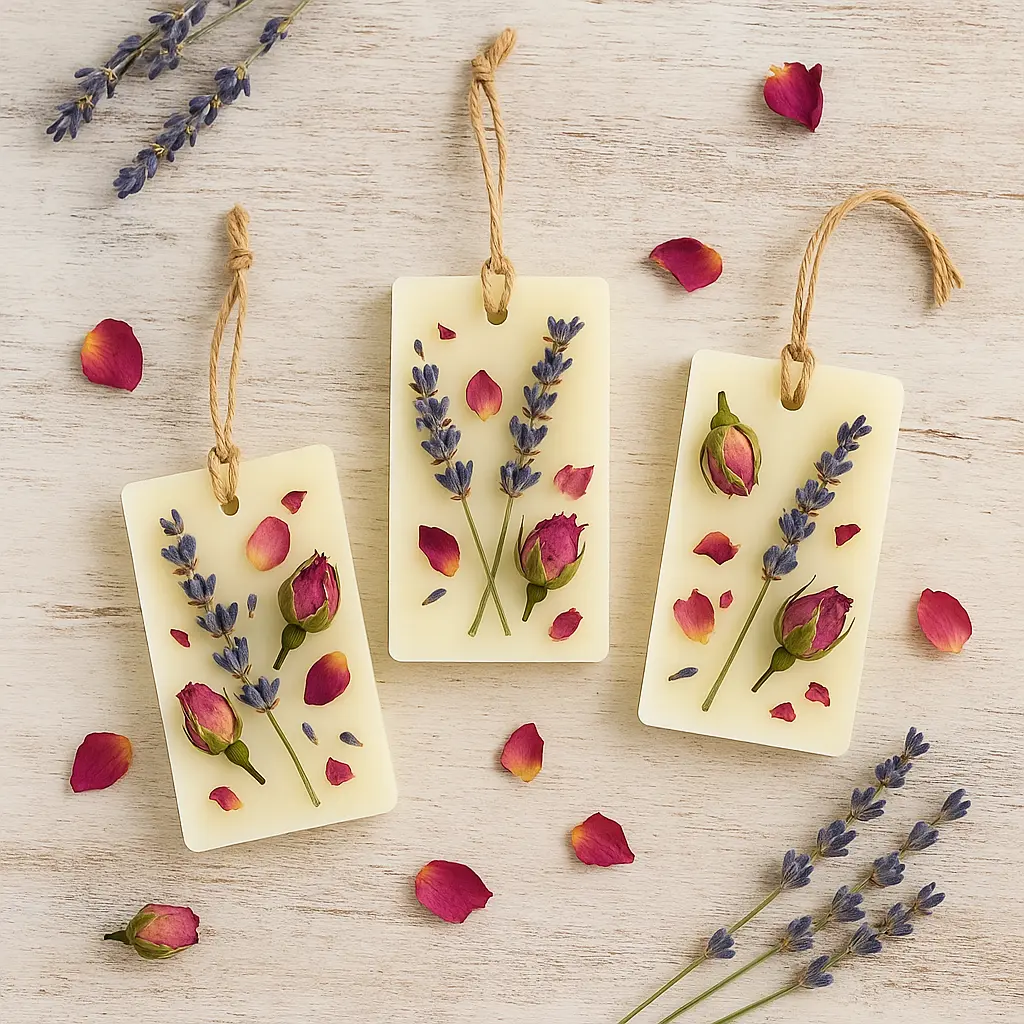
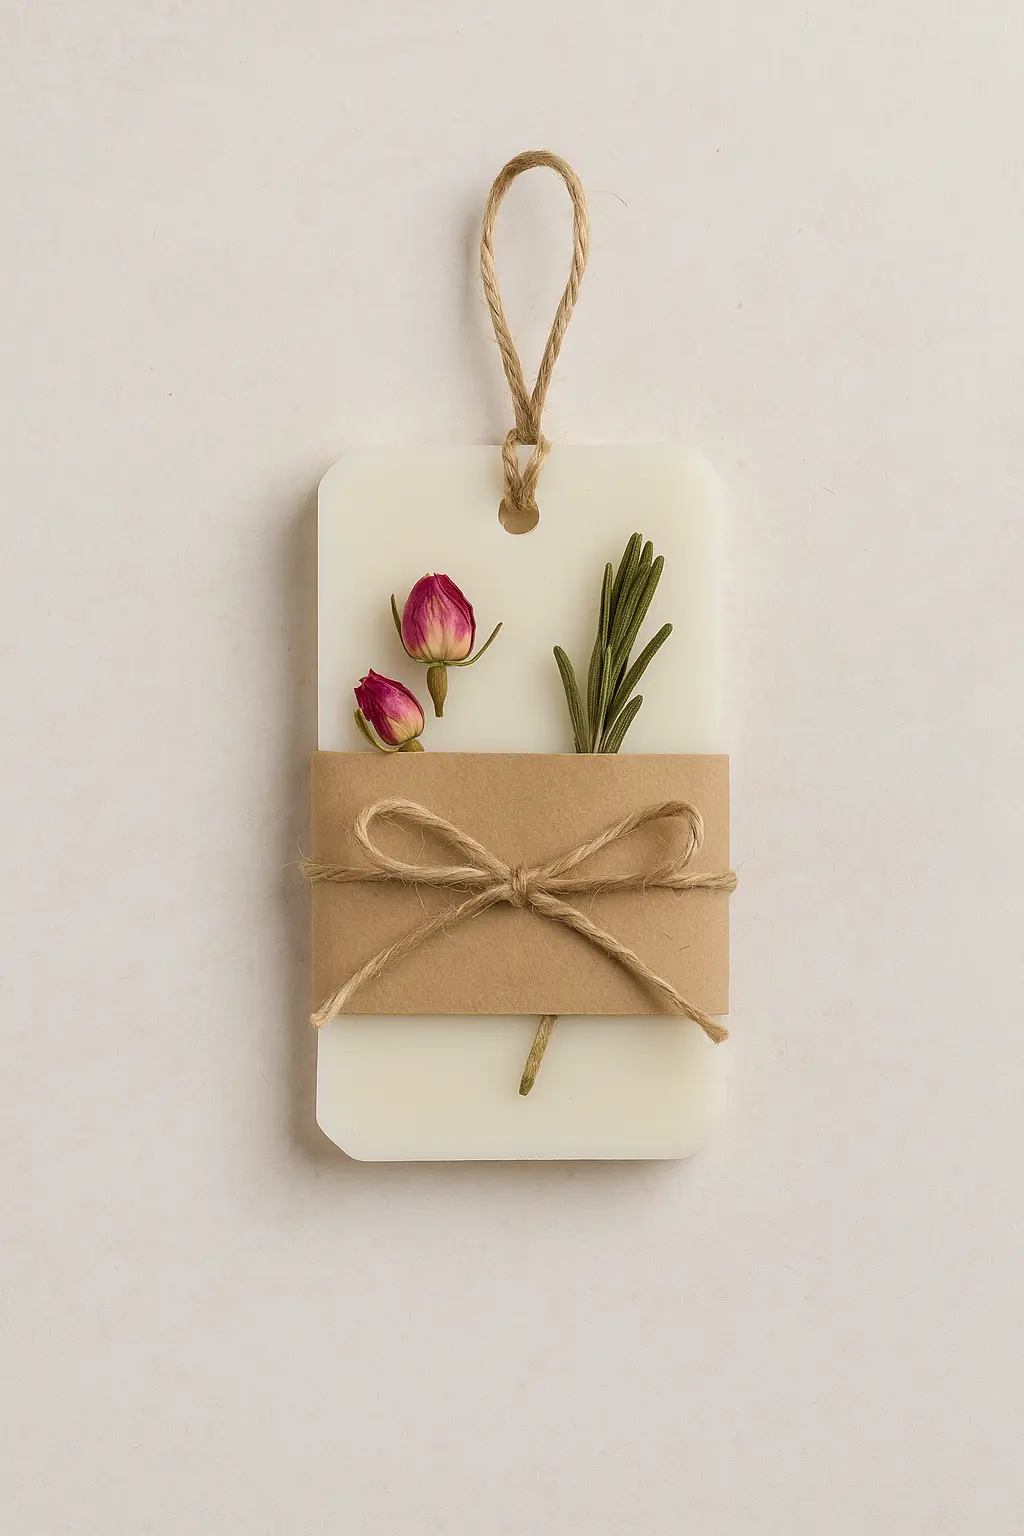
Dried flowers turn a simple wax sachet into a tiny work of art. They bring colour, texture, and charm — perfect for brightening a drawer, closet, or even a bathroom shelf.
A floral wax sachet is also a lovely gift. It’s thoughtful, handmade, and smells amazing without needing to be burned like a candle. Plus, it stays beautiful for months.
Why dried flowers are better than other decorations:
- They feel more natural and eco-friendly than glitter or synthetic embellishments.
- They complement natural soy or beeswax beautifully.
- They pair well with essential oils to create a complete scent experience.
When they shine the most:
- Seasonal décor: Lavender for summer, cinnamon sticks and dried orange for winter, jasmine for spring.
- Special occasions: Weddings, housewarmings, baby showers, festive hampers.
Choosing the Right Dried Flowers

Not all flowers behave the same in wax. For the neatest results, choose blooms that are:
- Flat or small – like lavender sprigs, rosebuds, jasmine flowers, or chamomile heads.
- Completely dried – moisture in flowers can cause discoloration or even mold over time.
- Colour-stable – bright petals (like cornflower blue or marigold yellow) tend to keep their colour longer in wax.
Flowers to avoid:
- Very large petals that curl.
- Flowers that darken quickly in heat (like hydrangeas).
- Anything not fully dried — fresh flowers will rot in wax.
Wax compatibility:
Soy wax is gentle and holds delicate flowers well. Beeswax works too but has a natural yellow tone that can slightly change flower colours. Paraffin is brighter but less eco-friendly.
Scent Pairing Ideas for Floral Wax Sachets
The beauty of dried flowers in wax sachets is that you can match their look and scent for a richer experience.
Some of my favourite pairings:
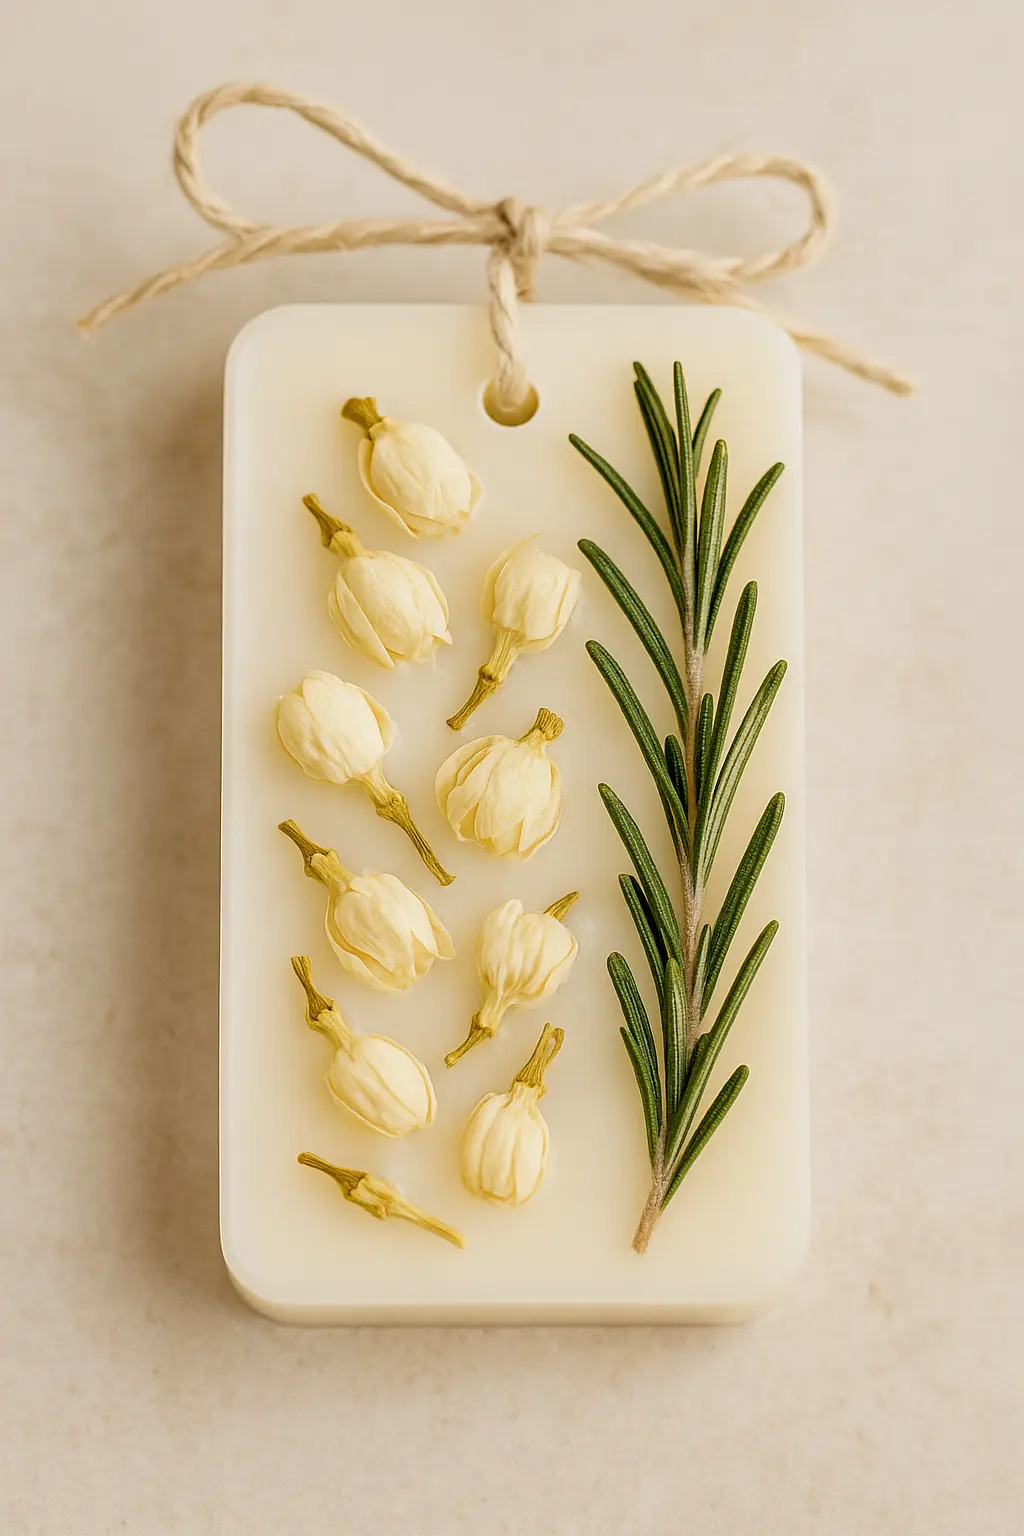
- Lavender + Rosemary – calming and herbaceous.
- Rosebuds + Vanilla – sweet and romantic.
- Chamomile + Sandalwood – soothing and warm.
- Orange Peel + Cinnamon Sticks – festive and spicy.
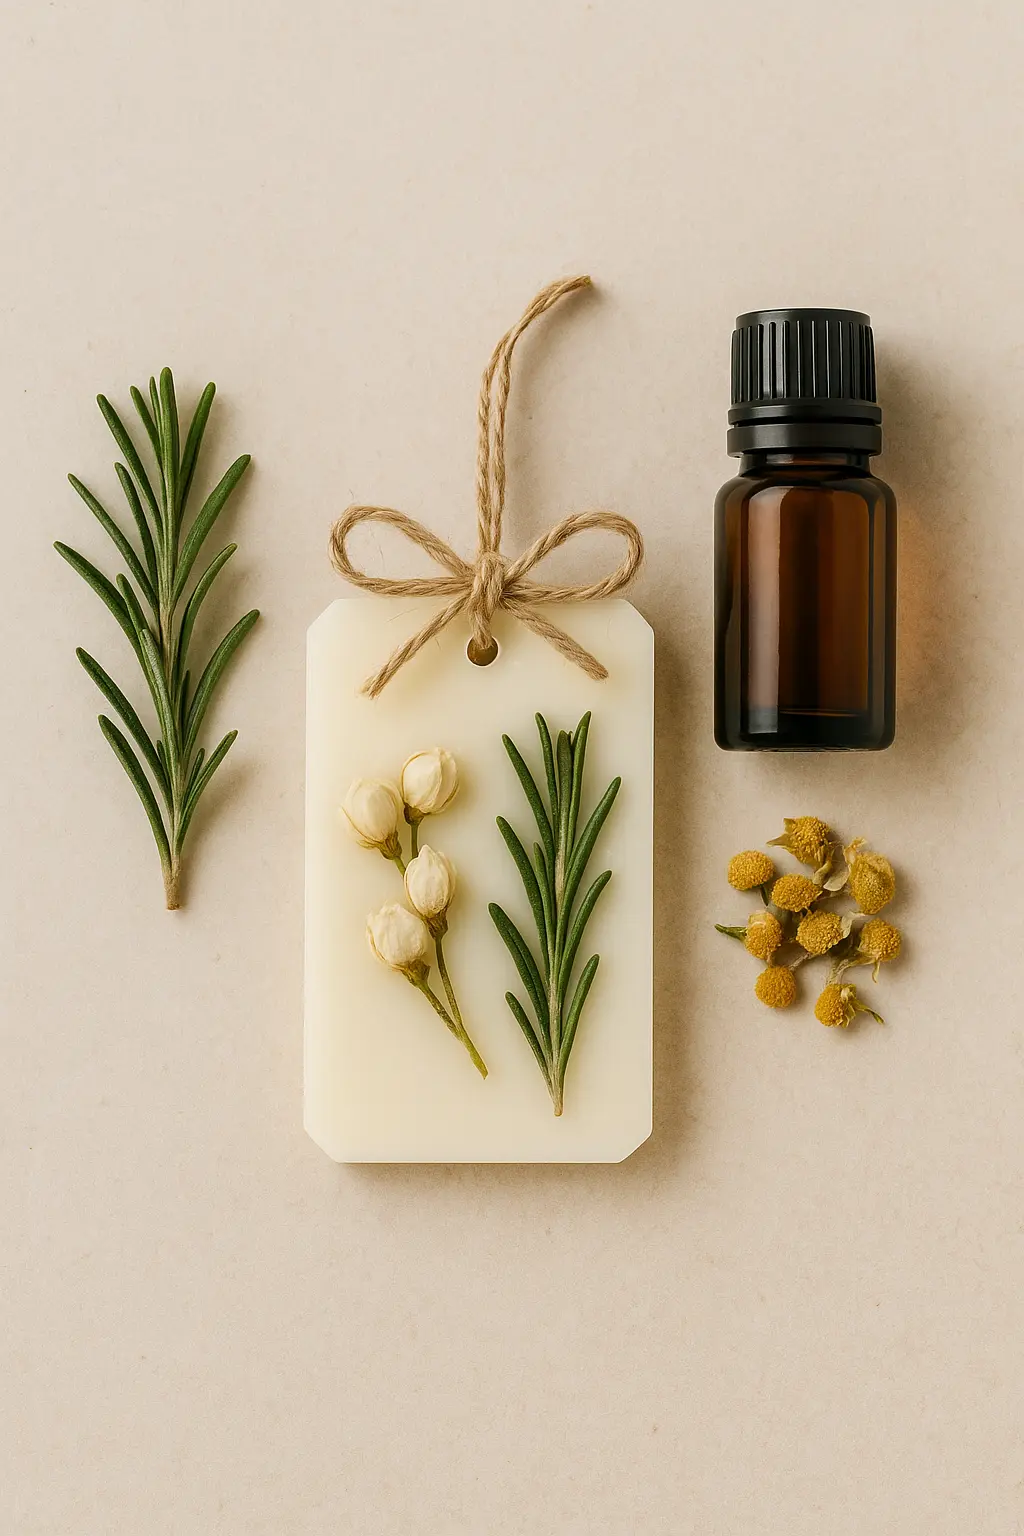
Tip: Always choose essential oils that match or complement the natural scent of the flowers.
Prepare Your Workspace (Mess-Free Tip #1)
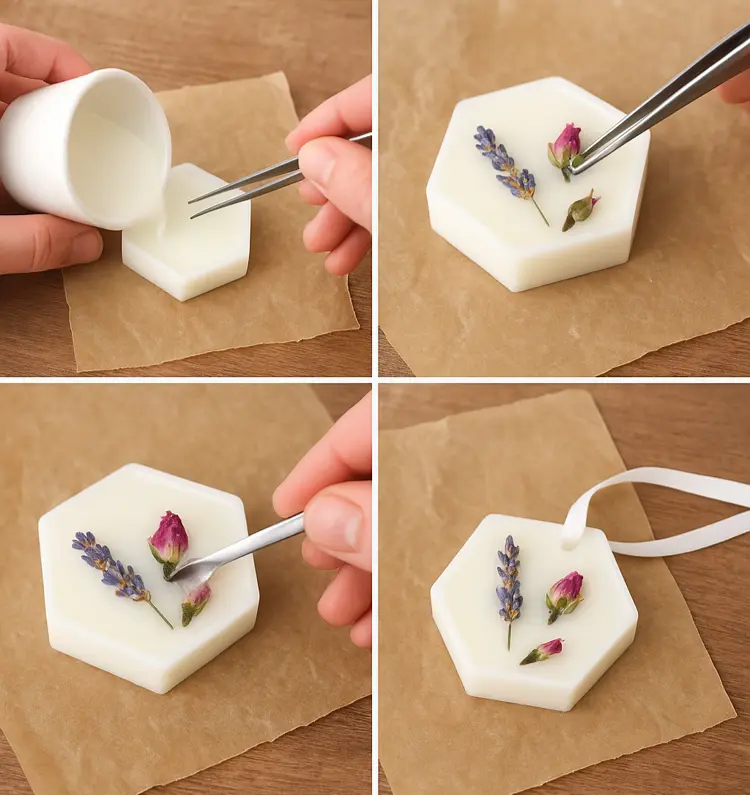
A tidy setup makes all the difference. Here’s what I keep ready before I start:
- Silicone mould for the sachets
- Tweezers (for precise placement)
- Small spoon for scattering petals
- Parchment paper or a tray underneath to catch spills
- Small containers to keep each flower type separate
Having everything within reach means you’re not scrambling when the wax is ready.
Add Flowers at the Perfect Time (Mess-Free Tip #2)
This is the single biggest change that made my process neater. Don’t add flowers when the wax is piping hot — they’ll float, shift, and sometimes turn brown.
Instead, pour your wax into the mould and let it cool for a minute or two, until it’s starting to thicken but is still soft on top. At this stage, your dried flowers will stay exactly where you place them.
Arrange with Care (Mess-Free Tip #3)
When decorating wax sachets, start with your larger flowers first, then fill the spaces with smaller petals or leaves.
- Use tweezers for precision.
- Press flowers lightly into the wax so they hold.
- Keep your design balanced — too many flowers can look crowded.
Think of it like arranging a mini bouquet — less is often more.
Set & Seal Your Floral Wax Sachets
Once you’ve placed your flowers, let the wax fully set before moving the sachets. If any petals stick up, press them down gently while the wax is still soft.
For an extra neat finish, you can pour a very thin layer of clear wax over the flowers once your design is done. This helps lock them in place without hiding their beauty.
Troubleshooting: Common Problems & Fixes
- Flowers floating: Wax too hot when flowers were added — wait a little longer before decorating.
- Flowers turning brown: Heat damage — reduce wax temperature before pouring.
- Uneven placement: Work in smaller batches so you have time to arrange without rushing.
Keeping Your Floral Wax Sachets Beautiful for Longer
- Store away from sunlight to prevent colours from fading.
- Wrap them in tissue or a paper sleeve if you’re gifting them — this keeps the flowers safe.
- Refresh the scent after a few months by adding a drop of essential oil to the back of the sachet.
- When the sachet has lost its scent, you can break it into pieces and use it in a wax melter — zero waste!
A Sustainable Touch
One of my favourite things about dried flowers in wax sachets is their eco-friendliness.
You can:
- Use flowers you’ve dried at home from your own garden.
- Repurpose flowers from old bouquets.
- Choose biodegradable packaging for gifting.
Every sachet can be both beautiful and kind to the planet.
Final Thoughts
Adding dried flowers to wax sachets doesn’t have to be messy. With the right flowers, perfect timing, and a few neat tricks, you can create floral wax sachets that look and smell beautiful for months.